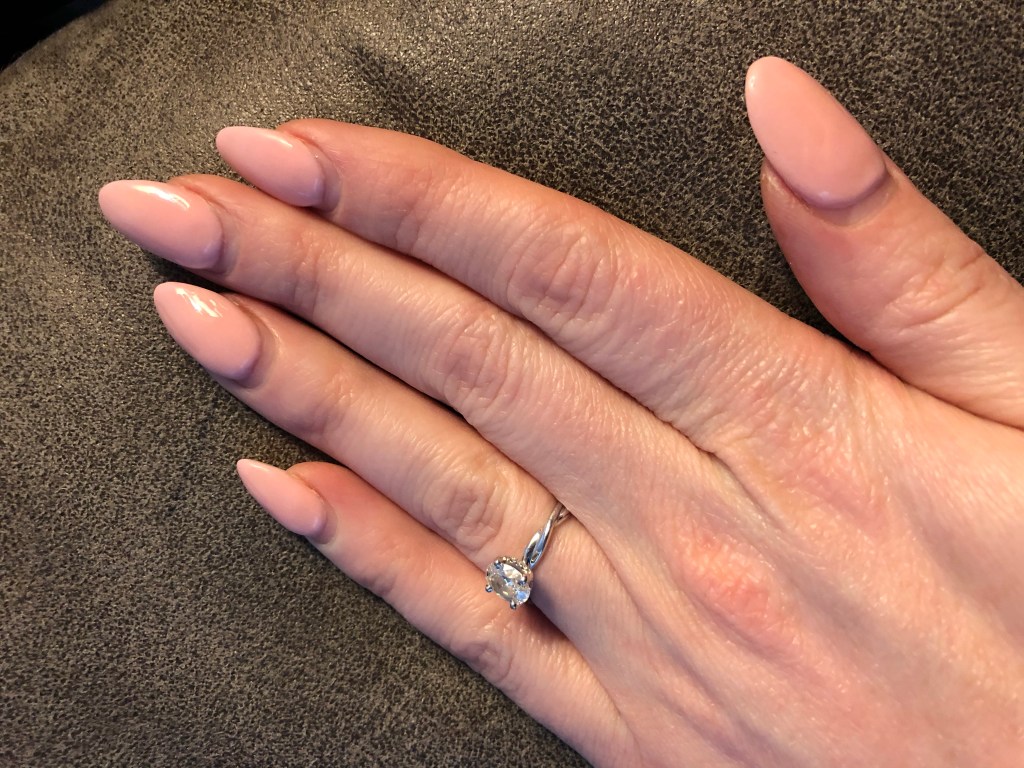
When I started having a little bit of financial freedom, one of the first things I started doing was getting regularly scheduled manicures. It might seem girly or silly, but having perfectly done nails made me feel like I looked more professional. I discovered gel polish, which made my tendency for cooking and washing my hands frequently not completely destroy my manicure. My Mad Men dreams of having nails that coordinated perfectly with my lipstick came true. Then a few years ago the “dip nail” style of “polish” came out and I’ve never looked back.
Between this new system, my vitamins, intense water intake and collagen protein, I’m able to have long beautiful nails that don’t chip, break or peel. They make me feel “put together” and fancy even on the days when I decide to stay in my yoga pants all day.
Then quarantine happened. I can only stand to go about three weeks before I need a polish change. The amount of growth at the three week mark is….not so pretty. Plus mine start getting so long they actually keep me from being able to do simple tasks like fastening my own necklaces… So on what is now deemed as my “special grocery store outing” I added a bottle of pure acetone to my shopping cart between that bag of spinach and my coffee creamer. You can get pretty much everything you need to remove your dip polish at any major big box or grocery store.

Items Needed for Dip Nail Polish Removal:
- 100% Pure Acetone *Make sure you actually check the nail polish removal bottle. Most only include a partial percentage, while others don’t have any at all. These won’t work to remove this kind of polish!*
- A high grit nail file (think extra rough)
- A low grit nail file (what you would normally use to smooth a rough edge or make the shape a little nicer)
- Foil (the very kind you have in your kitchen!) torn into little rectangles. About 3”x2” will work. Make them a little bigger than you think you need to fit around your finger, you’ll thank me for this later. Also, make about 20 of these because you’ll probably have a few tears during this process.
- Cotton balls – I pulled mine apart so that each one was actually two. Try to use the 100% cotton type because these are more absorbent.
- Orange sticks
- Patience….lots of patience
Step 1: Using the low grit file (the one that feels extra sandpapery and rough), gently file the tops of your nails to rough them up. This breaks that seal of clear polish your nail tech put on to keep them nice and shiny. You need a strong grit because you’re using this to break that protective polish seal instead of the metal dremel tool your tech uses.

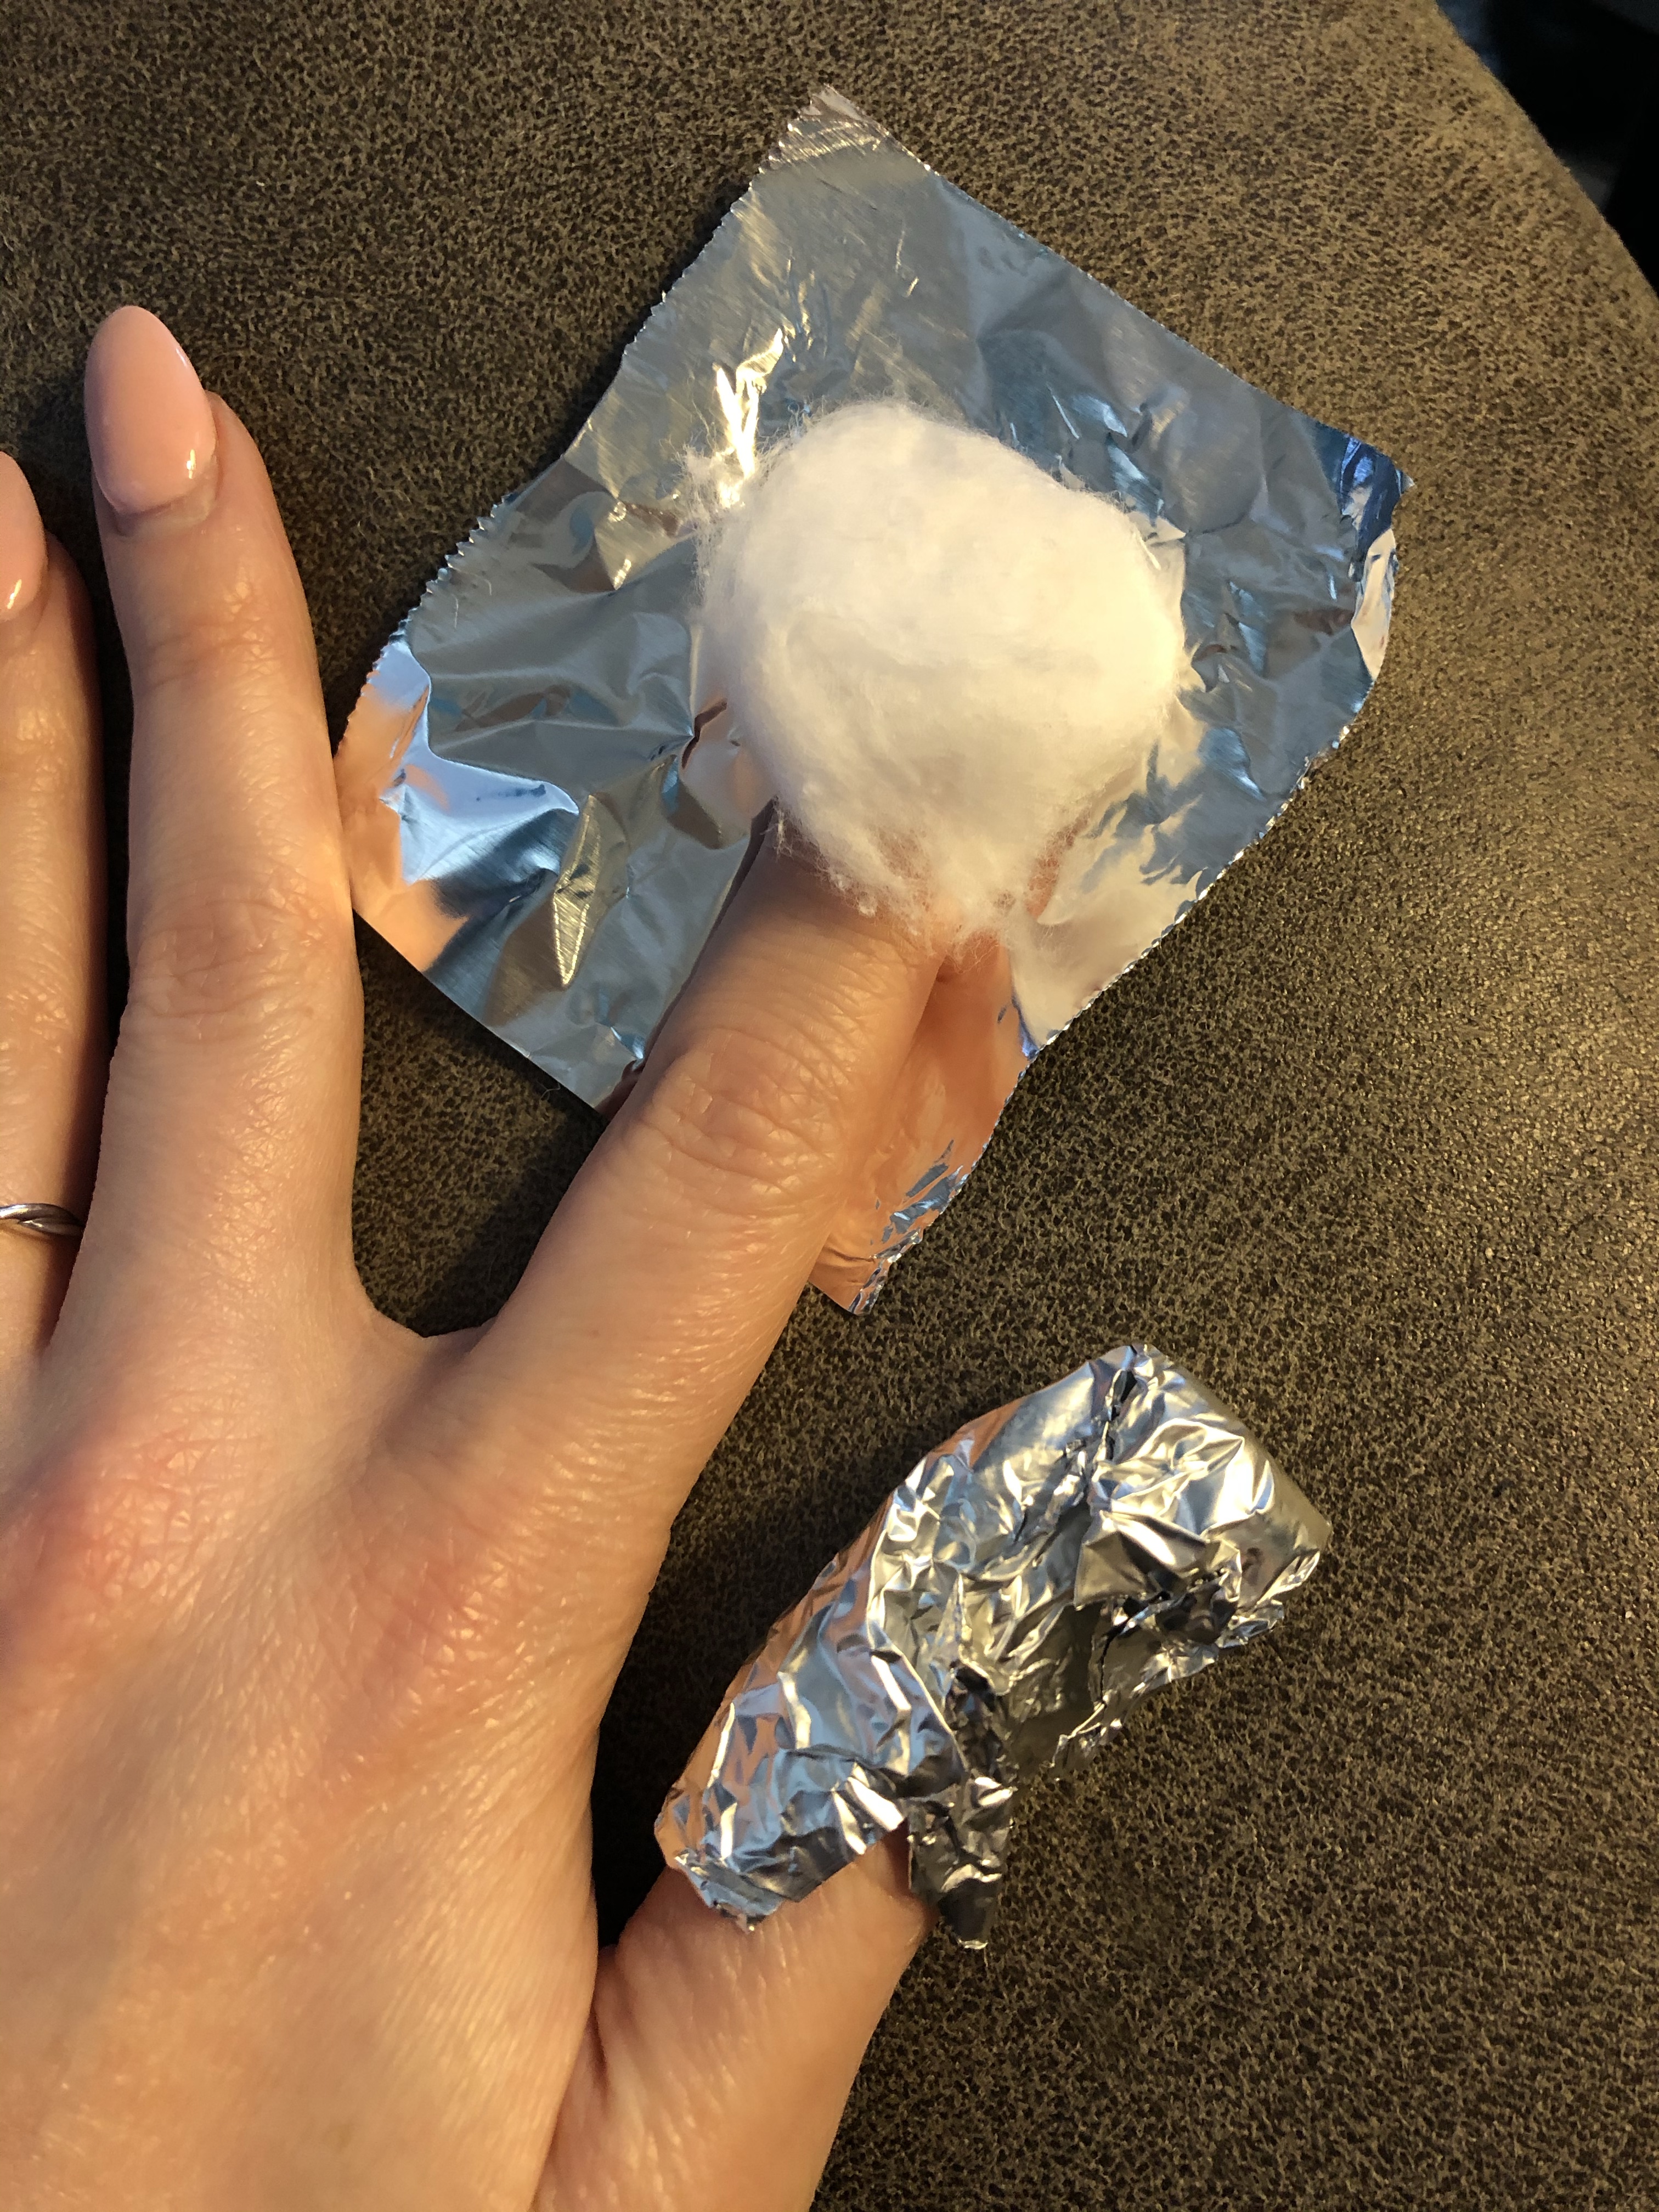
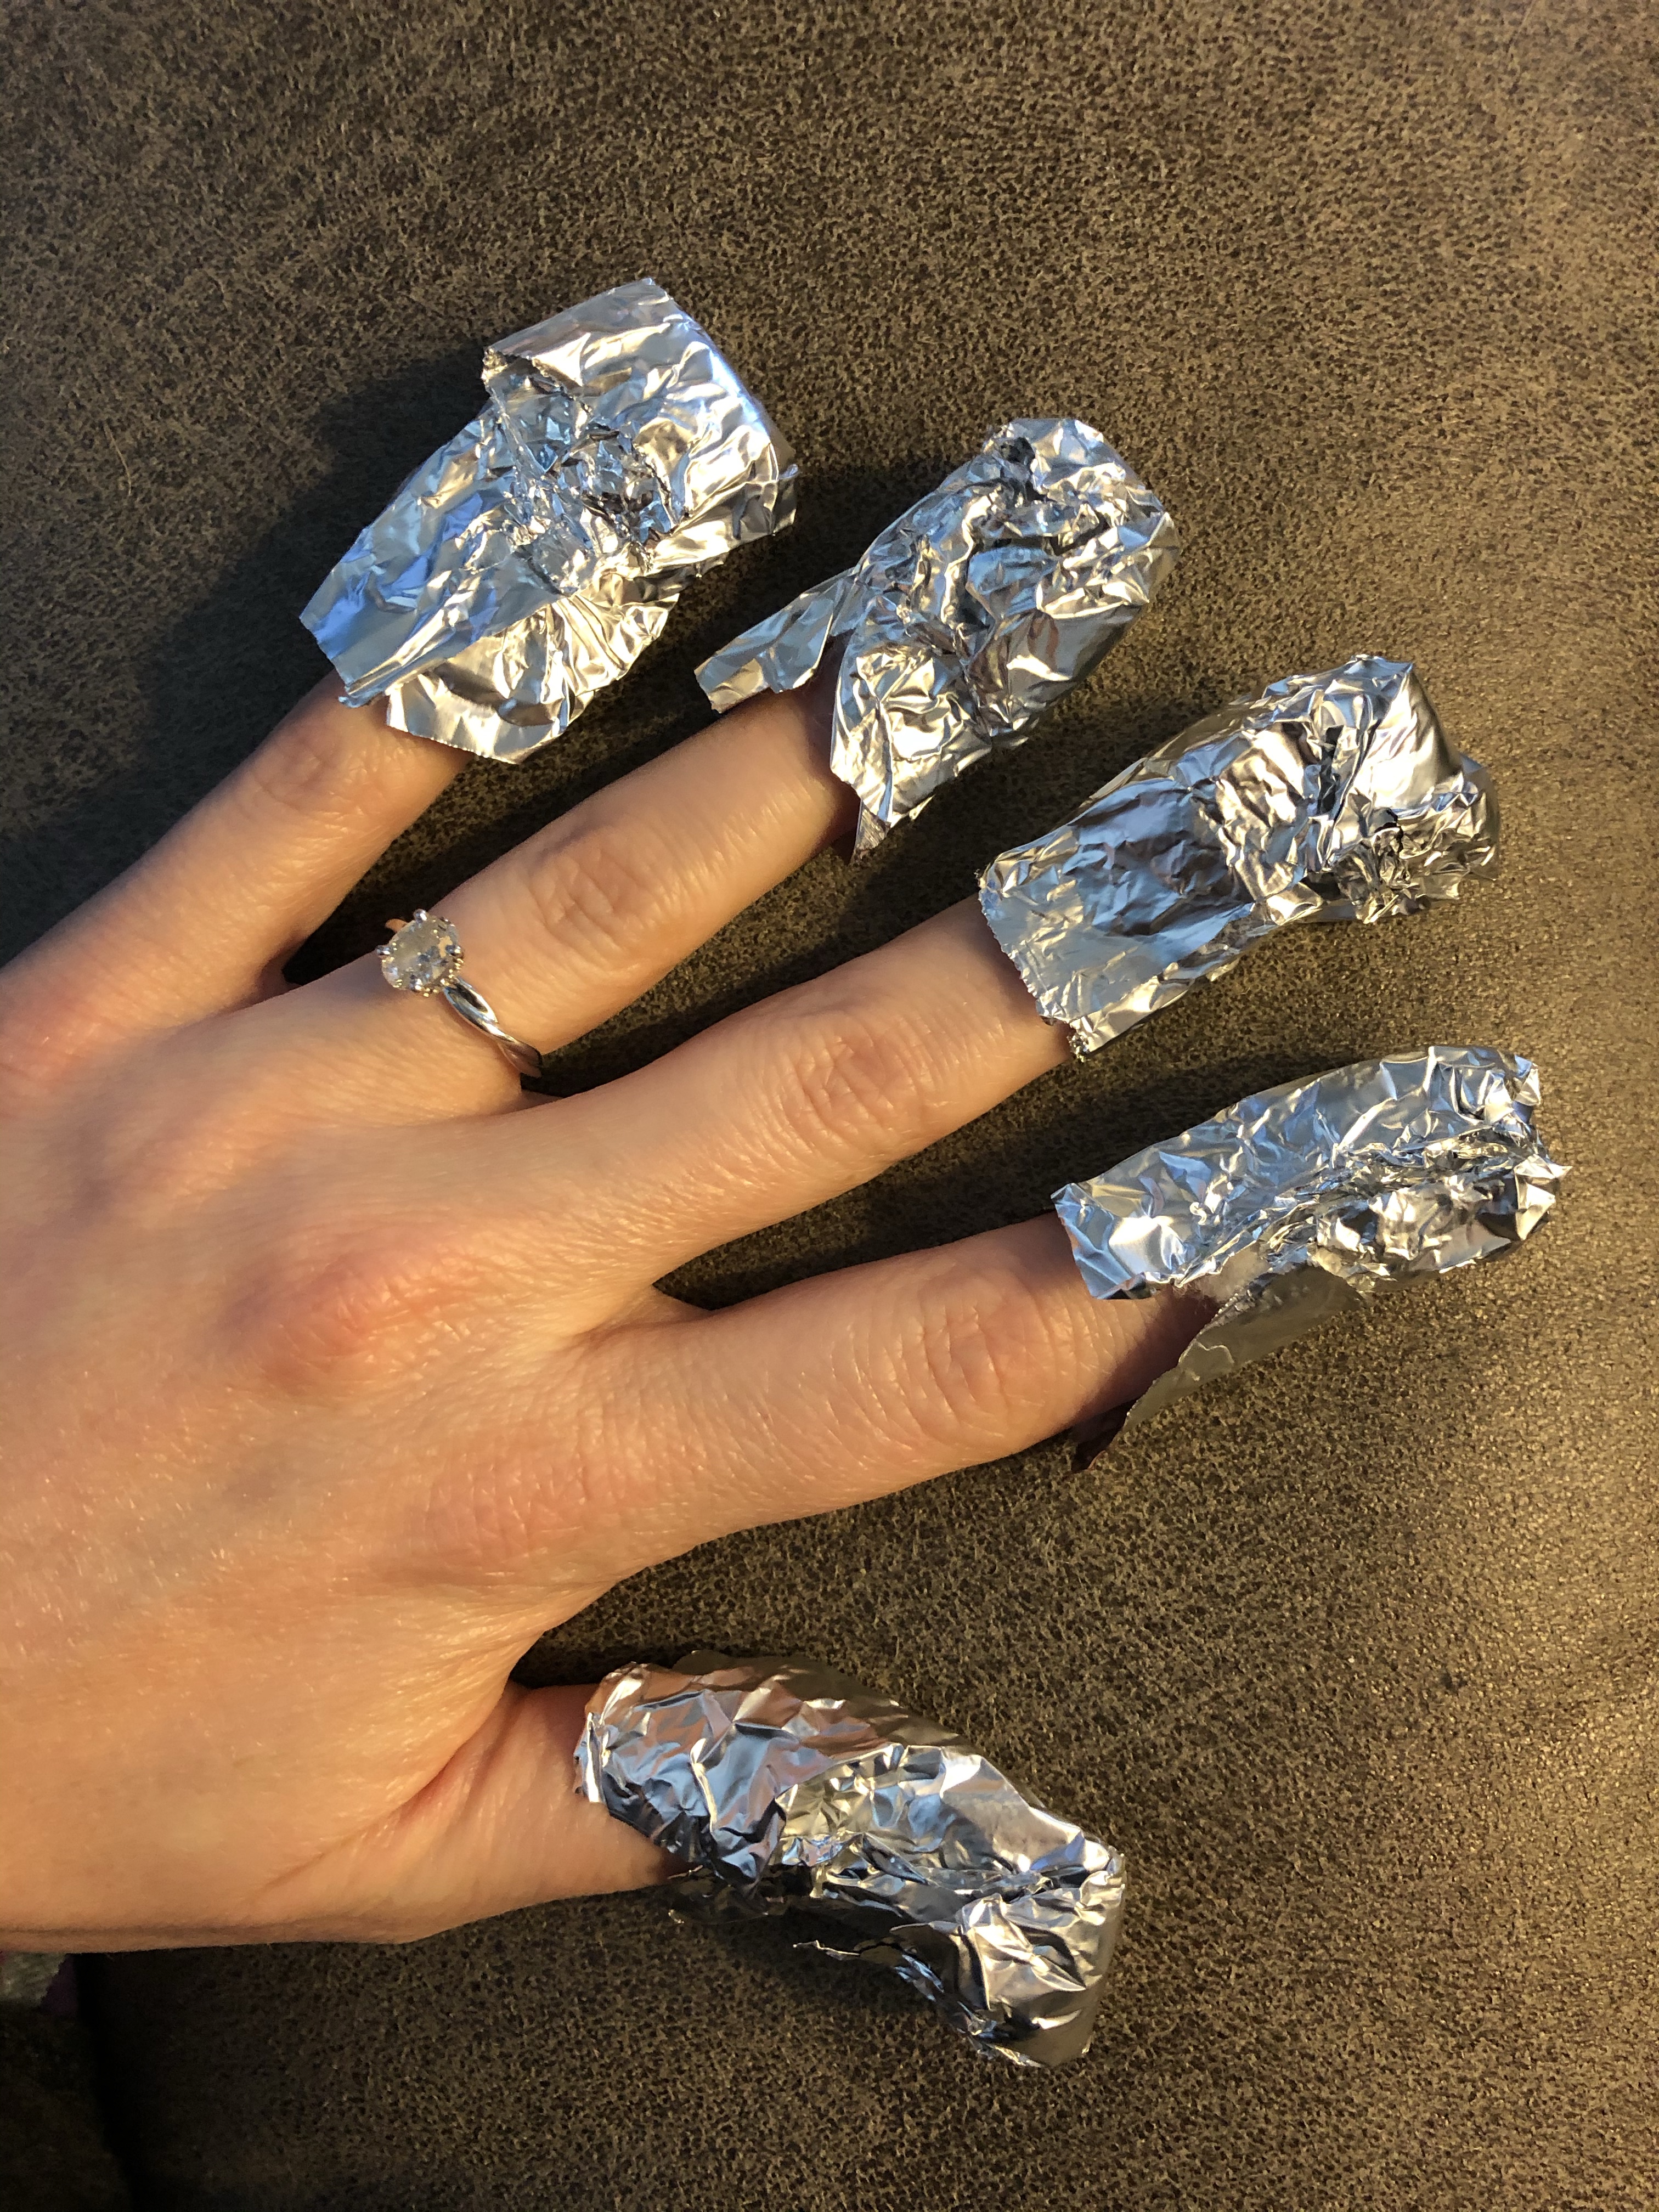
Step 2: Put a little rectangle of foil under your finger and take an acetone filled cotton ball (not so much it drips everywhere!) and place it over the whole nail. Then wrap that excess foil around your finger in a little foil packet. *Be careful with this acetone!! It can discolor fabrics, ruin table finishes, and burn like the fires of hell if it gets in a paper cut!* Do this for each nail. You may have to work on one hand at a time unless you have a little helper with you who can wrap up the second set of fingers. I didn’t so that’s where the patience really starts to come in handy!
Step 3: Hurry up and wait. I let mine soak about 10 minutes or so before checking them.
Step 4: Remember that technique your nail gal (or guy) uses as they unwrap the little foil packet where they kind of pull that cotton ball across the surface of your nail pulling that sticky nail polish goo off with it? Do that. Now depending on how well you pre-filed, and how many layers of that dip polish you’re breaking through (mine uses 3-4 layers depending on the color PLUS the gel top coat – my hair will give light colored nails an orangy tint while washing if she uses a regular top coat) you may need to repeat steps 1-4 a couple of times. If it’s already getting sticky, don’t re-file. Only re-file if you’re now realizing you didn’t understand how much you truly needed to file to break that seal down. Again more patience!! I used an orange stick to aid in pushing the stuff off my nails. This gets a little sticky plus there’s cotton and I may or may not have looked like a little girl that licked her fingers while trying to eat cotton candy. You know that kid that has pastel fluff stuck to….well everything.
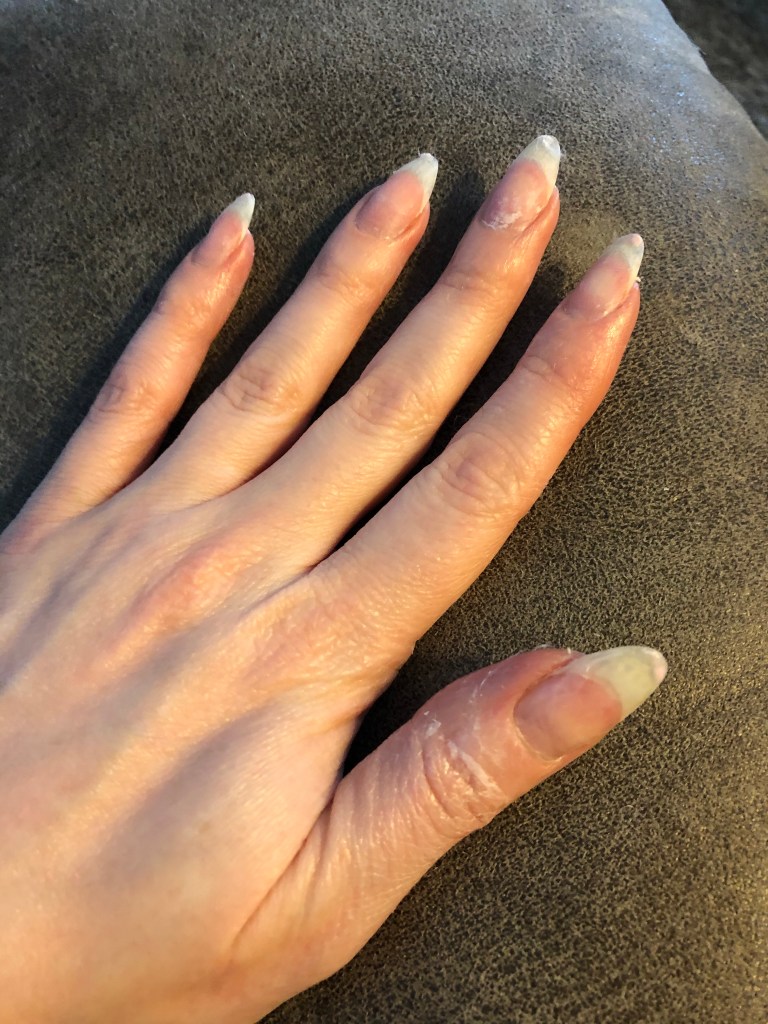
Step 5: After you’ve repeated steps 2-4 enough to remove most of the color, use some fresh cotton balls and acetone to remove the last bits of color.
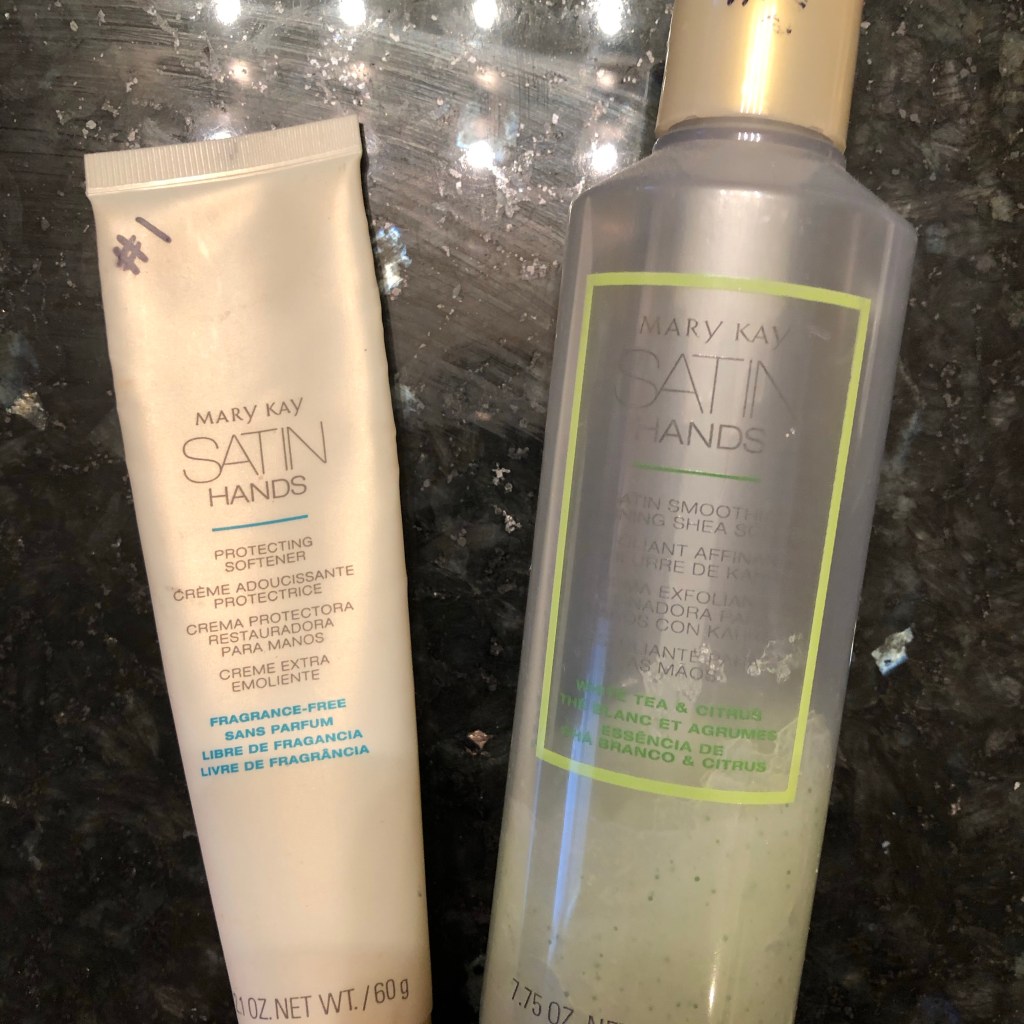
Step 6: My hands and fingers were such a mess after using all that acetone, so I would suggest using a hydrating hand scrub to get it all off. I used the first two steps of my Mary Kay satin hands set and it made them nice and soft, getting all the “cotton candy” residue off. If you don’t have something like that, you could use a teensie bit of Vaseline running and massaging it into your fingers, followed up with a gentle face scrub and rinsing with warm water.
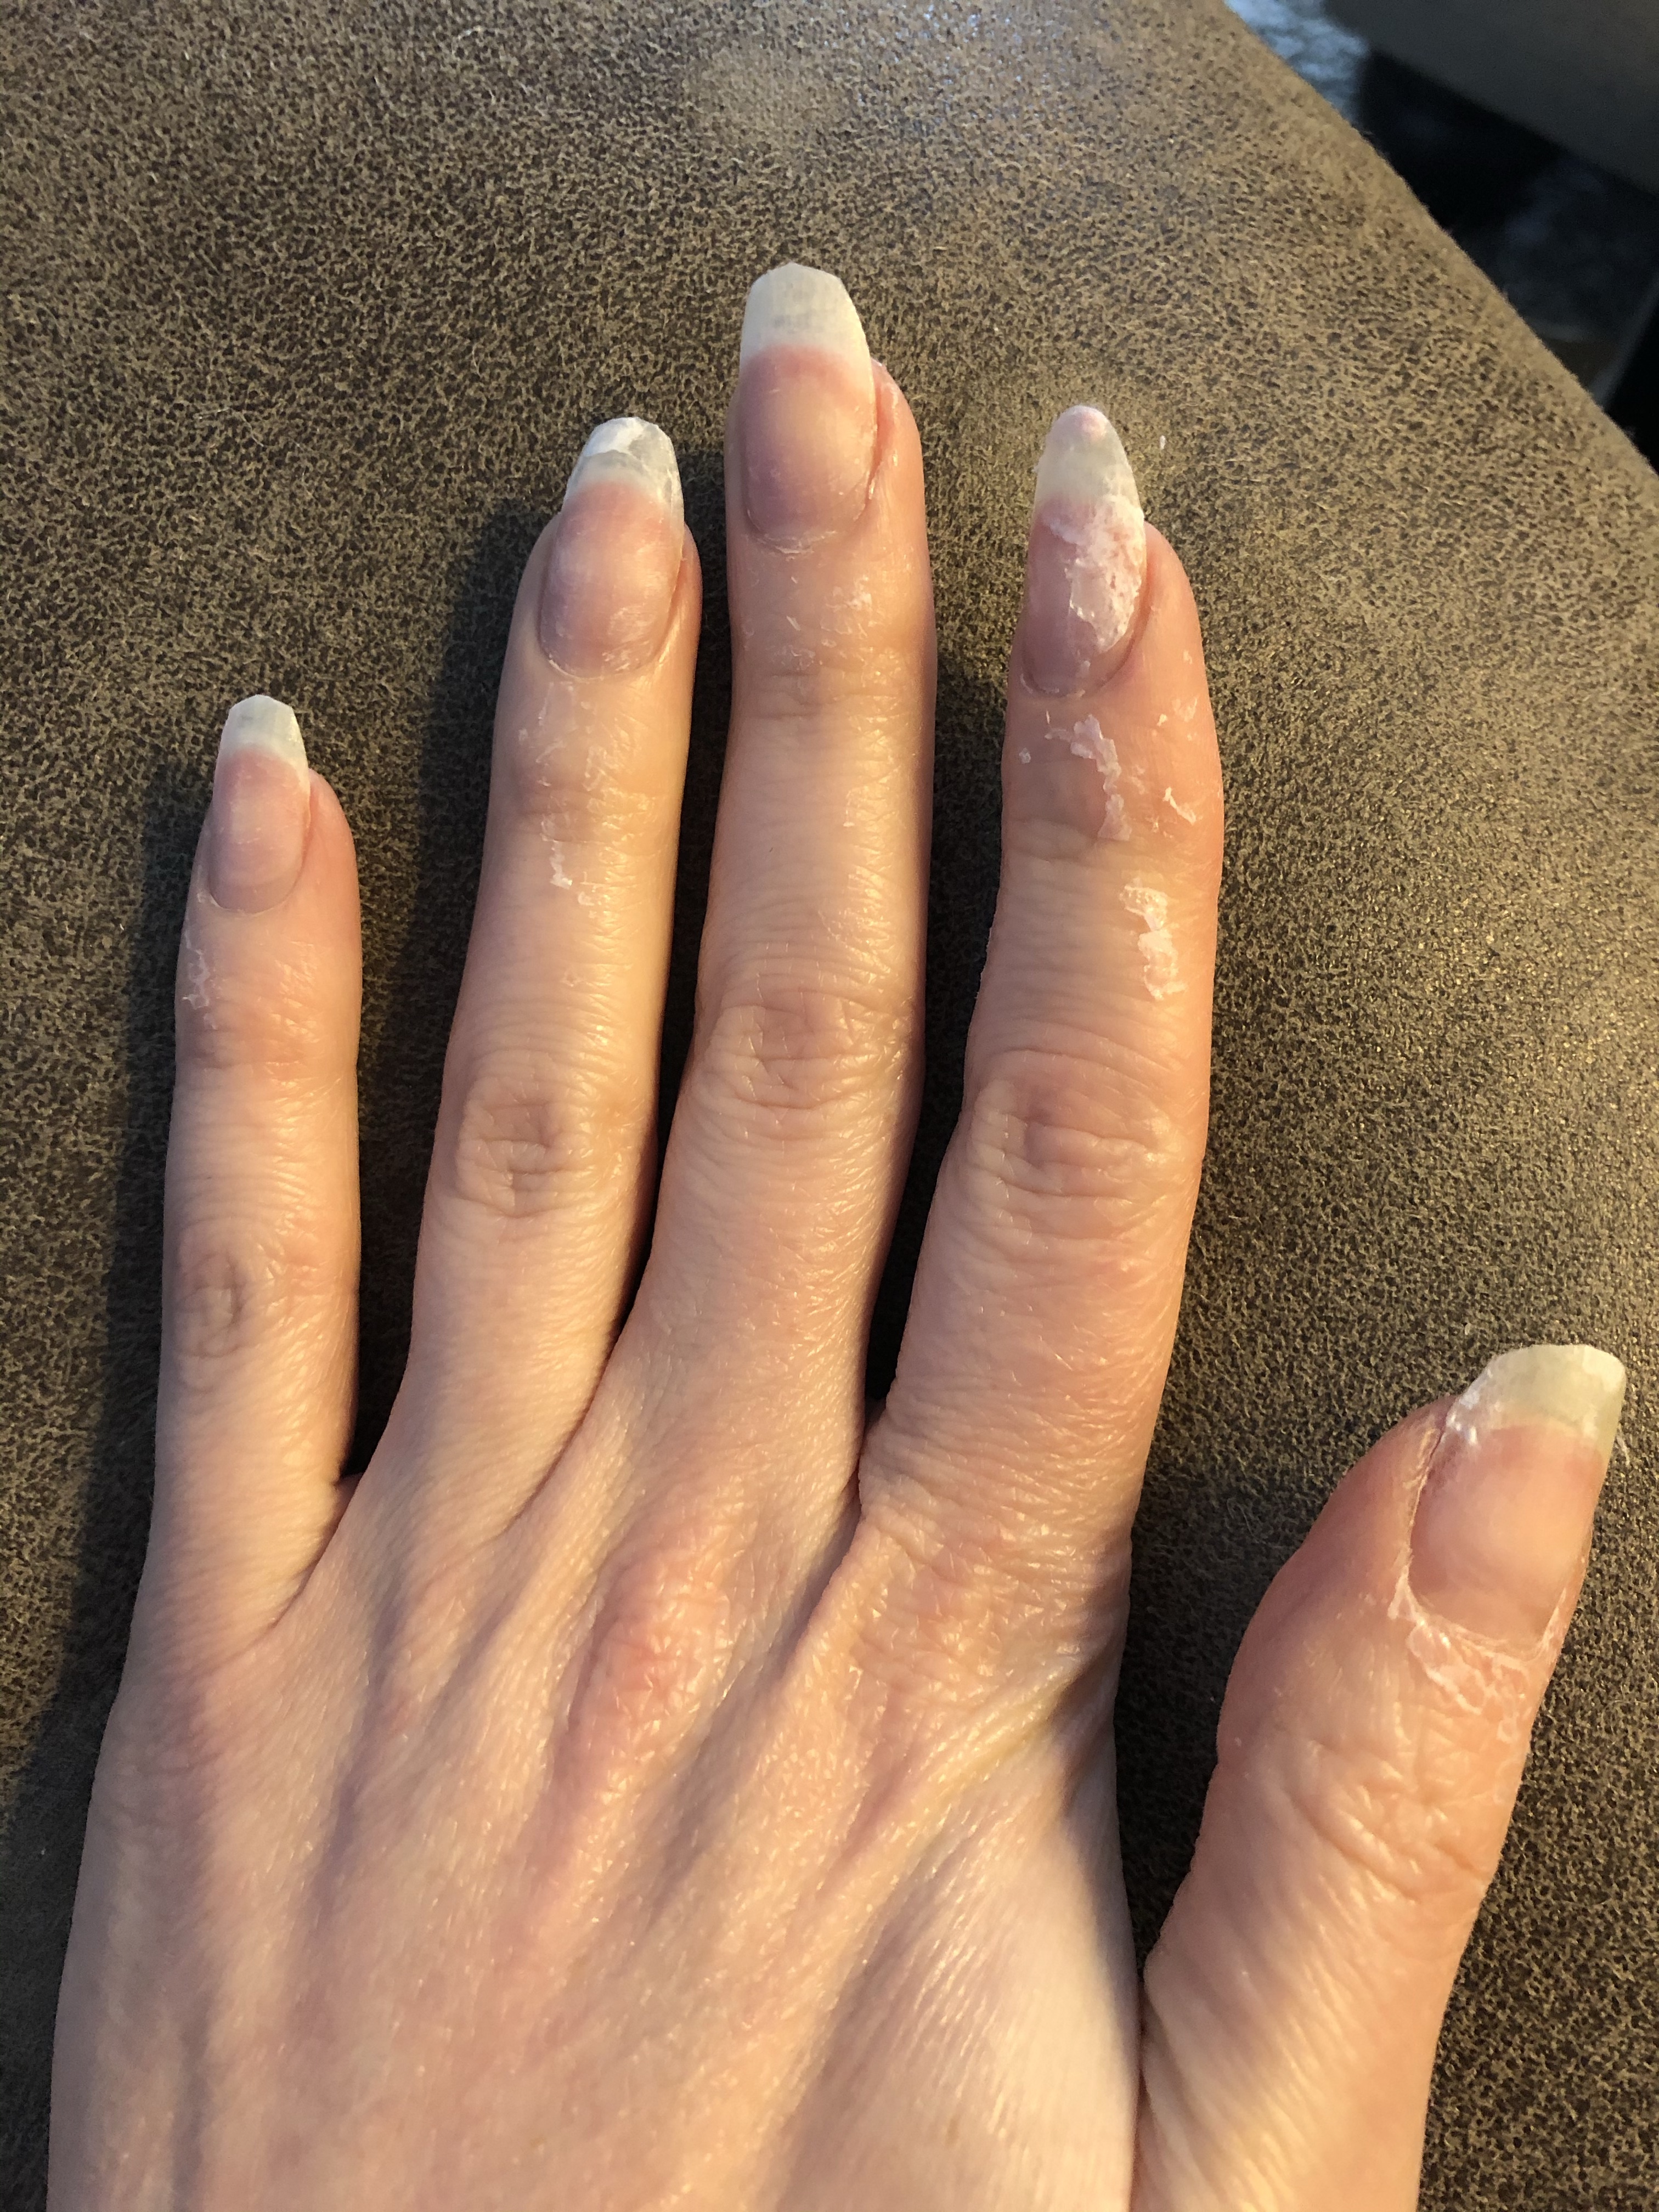
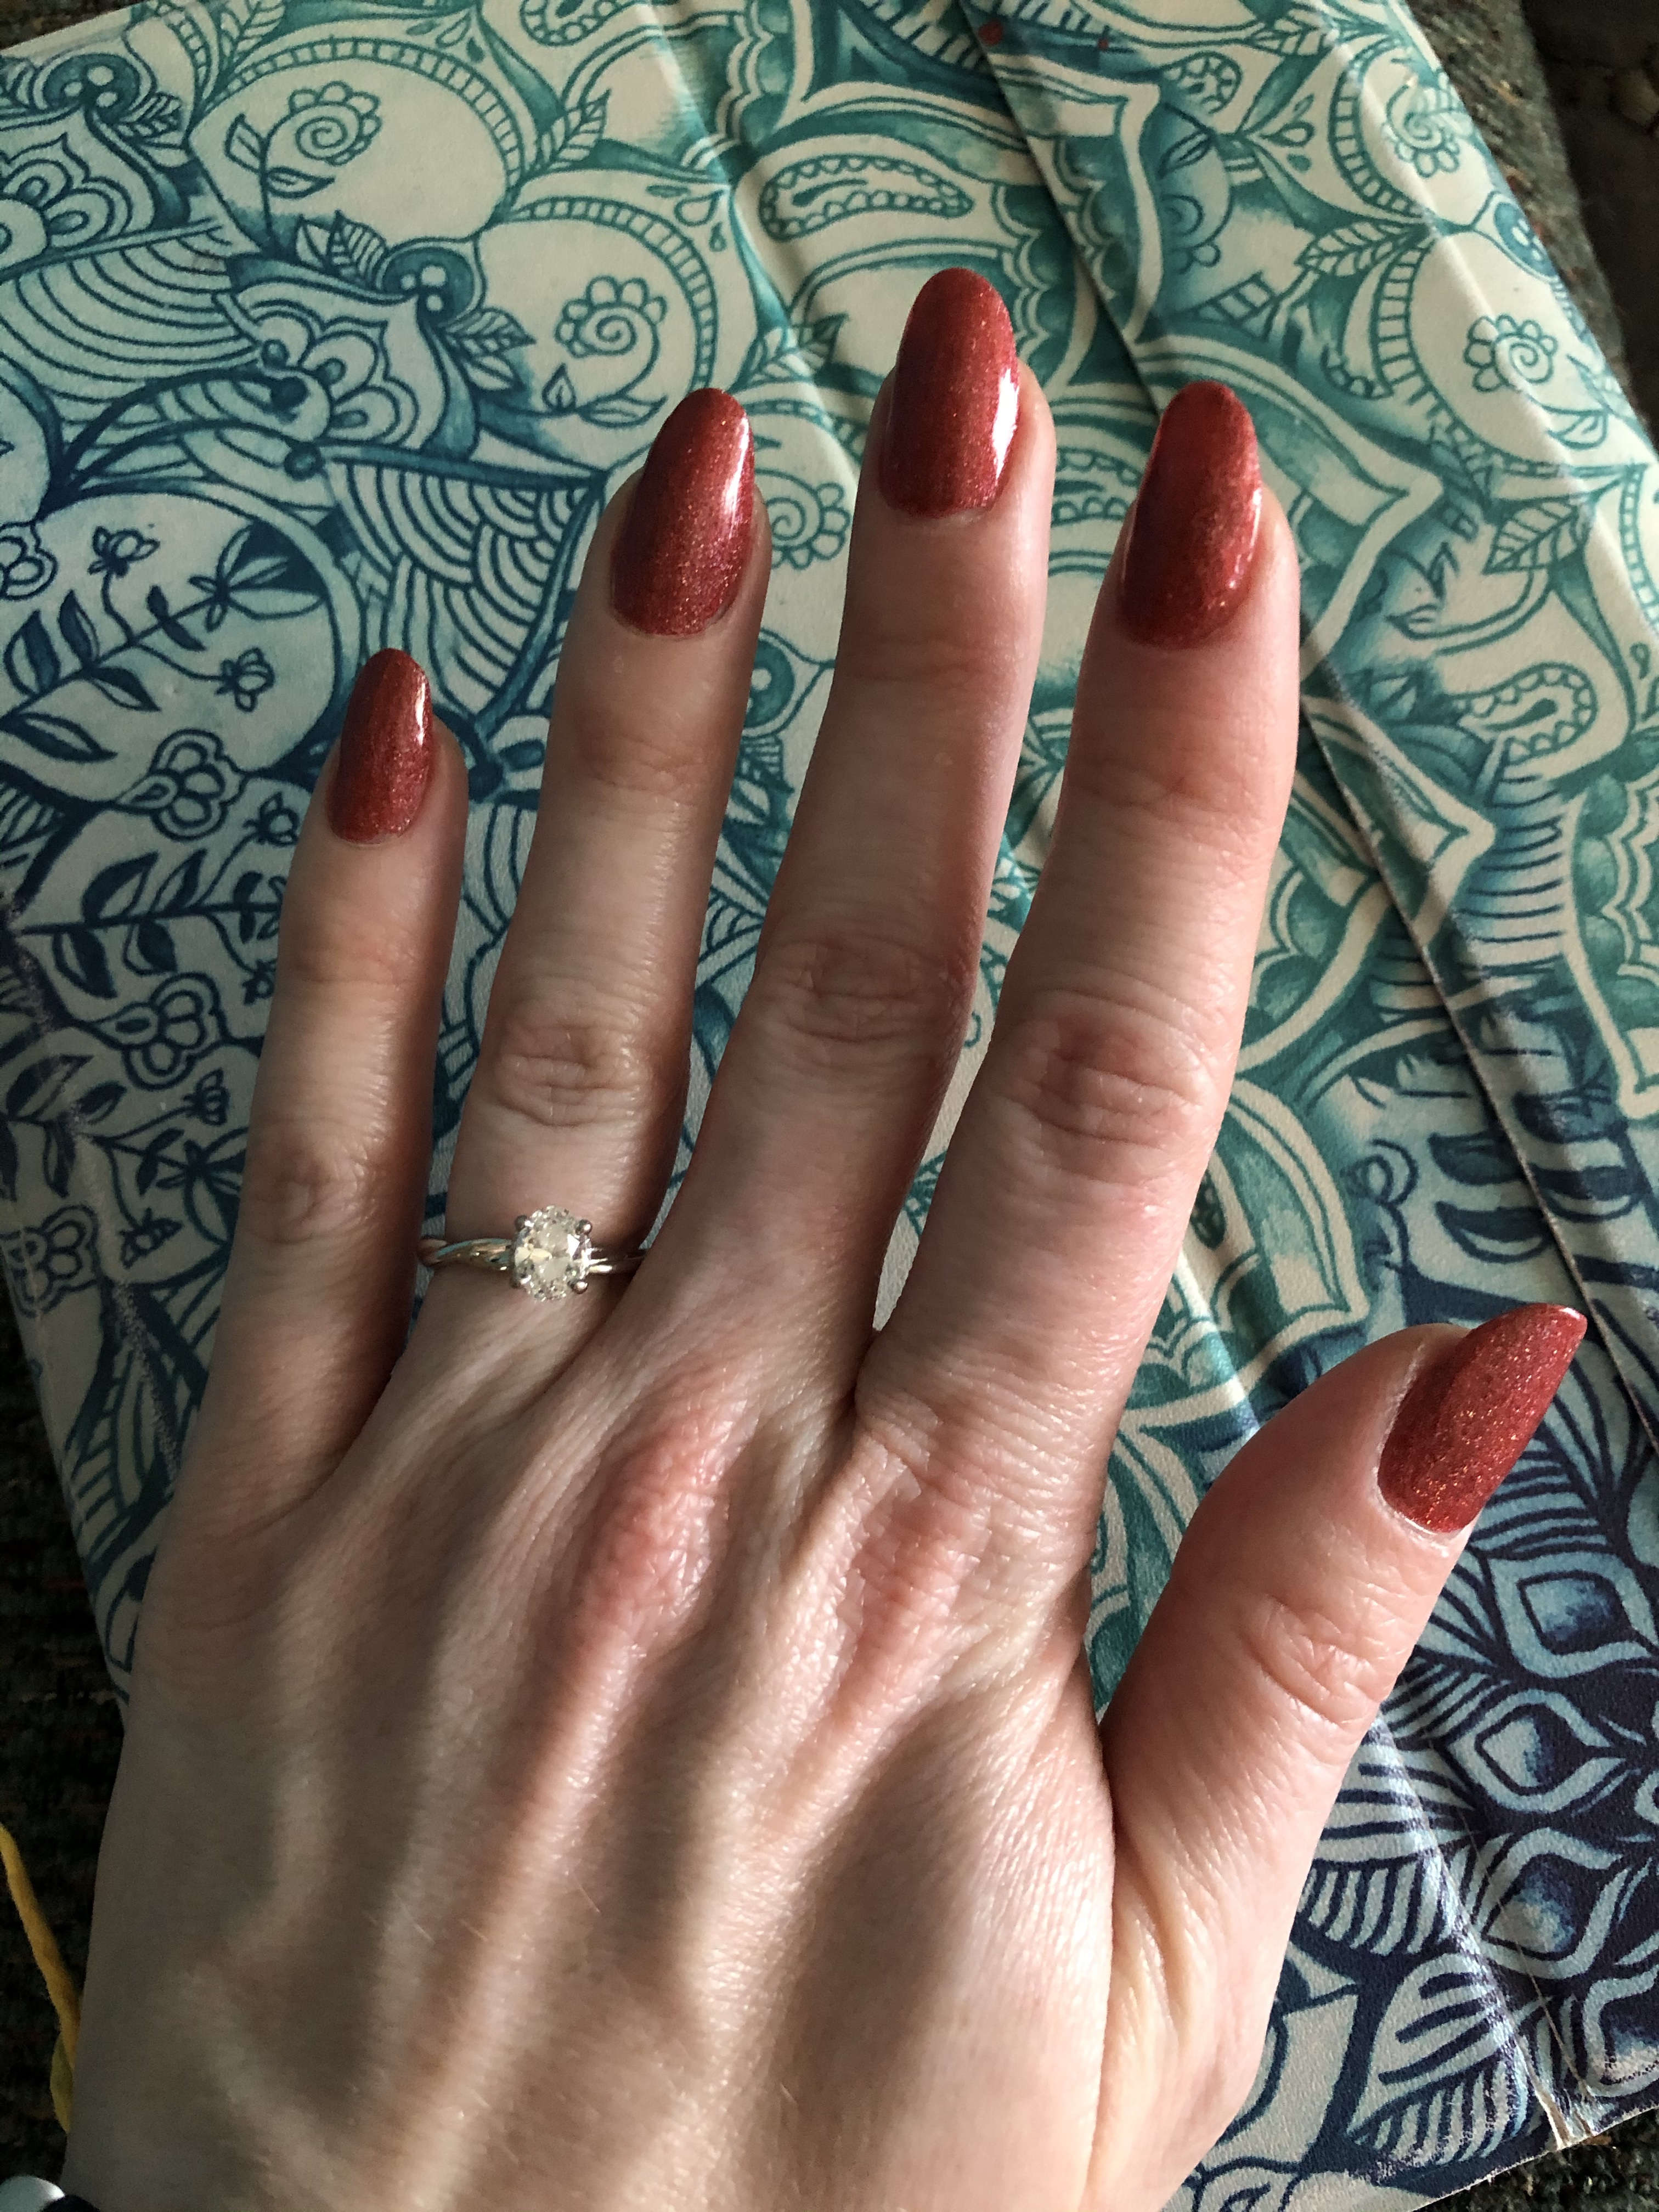
Since you won’t be putting any dip polish back on your nails, I would suggest trimming them down at least a little bit depending on how long they are currently. They will be a lot thinner than you’re used to and this will help make sure you don’t tear or rip one. I followed up with a little at home manicure, using a couple of extra clear top coats for strength. If you don’t want to take the time to put regular polish on your nails, I would still suggest at minimum a clear top coat for the above reasons.
Hopefully this helped you get those nails under control AND also do a little something for yourself during these strange times we are currently in. Let me know if you have any problems or questions!

Aѡ, this was an incredibⅼy nice post.
Taking the time aand actual effort to сreat a ɡreat article…
but what can I say… I procrastinate a whіle lot
and don’t manage to geet anythіng done.
My blog marc
LikeLike